
Building an LLM-based text translator
Let's use LLMs to translate some text for us!
These days, we hear all about AI/LLMs and how useful they can be. There's one thing that LLMs do exceptionally well: translating text!
I wanted to create my own translation service because I did not want to rely on any external service for providing translations. This can be really costly depending on the volume of requests I generate.
So that's when my experiment began. Initially, I was planning to make an automatic message translator for Matokai, but decided I must start simple and decided to create a Google Translator-like service instead, for the time being.
Planning out what I have to build
For the server portion, I am aiming to use LLAMA which provides bindings for Python combined with Bottle for the web-server, so I can easily create requests from the client to the server.
As for the client, I will be using Vue alongside TypeScript to build a basic interface where the user can provide inputs for the translation endpoint.
Why Bottle?
Bottle is extremely light weight and is perfect for this service that will really only have one single endpoint. I like using Bottle for integrations such as rendering 3D models and connecting AI with the web like I am doing today in this post.
Since it's so light weight, it's very quick and easy to get started with it. But honestly, Bottle can also be used for large scale APIs using other integrations and ORMs to manage data, but that is out of the scope of this post.
Bottom line: It's simple, small and nice.
Building the front end
Now that we have a general idea of what we want to build, let's start by creating a simple Vue component where the user is greeted with a simple form where they can
- Provide what language they wish to translate to - this can be any language, so I am opting to make this a text field instead, as the AI will understand what they mean in most cases.
- Type text in any language they desire, as the AI will attempt to automatically detect what language their input is.
- See a readonly text area where they can see the result of the translation.
So after quickly designing a logo in Figma, coming up with a very fitting name and writing some text, this is what I came up with:
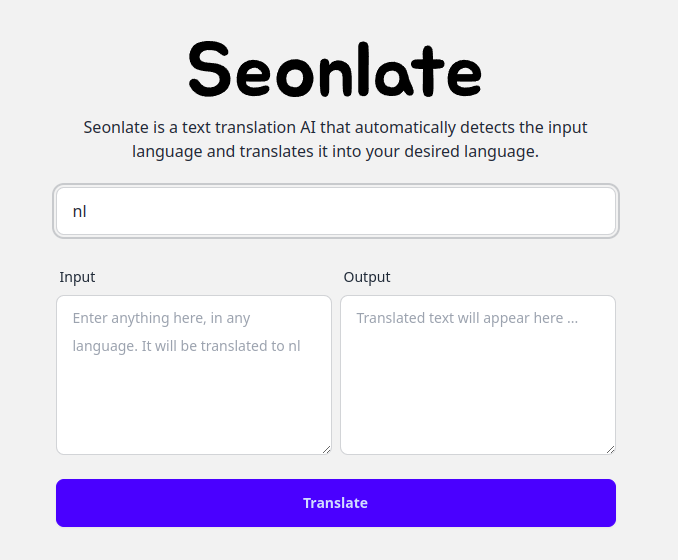
It is an extremely simple form where the user can specify all the required information as outlined earlier. Perfect for our use case.
But let's make it a little nicer. Because we're using Vue, we can use its reactivity system to dynamically render elements based on a condition. So let's make the text areas and translate button not render at all until the user has given an input.
To do this, we must declare a variable within our component using Refs. But we must also do this to know the language in the first place, so let's go ahead and declare everything we need within an interface:
/**
 * Represents the properties expected by the AppComponent.
 */
interface IAppComponent {

    /**
     * A reactive reference to indicate whether the network is currently processing.
     * We use this to give the user feedback through the user interface.
     */
    isNetworkProcessing: Ref<boolean>,

    /**
     * A reactive reference to indicate whether the network request has failed due to an error.
     */
    hasErrorOccurred: Ref<boolean>,

    /**
     * A reactive reference to store the target language for translation.
     * This is entered by the user through the user interface.
     */
    targetLanguage: Ref<string>,

    /**
     * A reactive reference to store the text the user wishes to translate.
     * This is also entered by the user through the user interface.
     */
    contentText: Ref<string>,

    /**
     * A reactive reference to store the translated text returned from the server.
     */
    responseContent: Ref<string>,

    /**
     * Performs translation by requesting a translation from the server.
     * @returns A Promise that resolves when the translation is complete.
     */
    translate: () => Promise<void>;
}
Let's break this down:
isNetworkProcessing- This is a simple boolean I will be using to dictate whether the translation request is pending so I can update the user interface accordingly to give the user feedback and to show a loading spinner.hasErrorOccurred- This is yet another boolean that I will be using when the network request has failed for any reason. This could range from the API being unavailable to the user not having an internet connection. It will be used to show a basic error.targetLanguage- This is the language we will be translating into and this is the user input provided by our user. We will send this to the server and we will be using this to hide the rest of the form if the length of this string is 0.contentText- This is the content provided by our user that we will be passing to the AI to recognize (it will detect what language it is) and translate.responseContent- Once the server has translated the content provided by our user, it will have to be stored somewhere - this is it.translate- This method is the function that will send the request to the API and fetch its response - the entire logic of the application relies on this one function.
Now that we have all the variables we needf for the application to function, let's start making sure the form is not rendered at all if the string length of targetLanguage is 0 (empty).
We can easily achieve this by using the v-if directive that Vue provides:
<!-- Input template - only rendered when the user has given us a target language !-->
<template v-if="targetLanguage.length > 0">
	...
</template>
Great! Now the rest of the form will not render until we know the language we are going to translate into, so this is what we are left with:
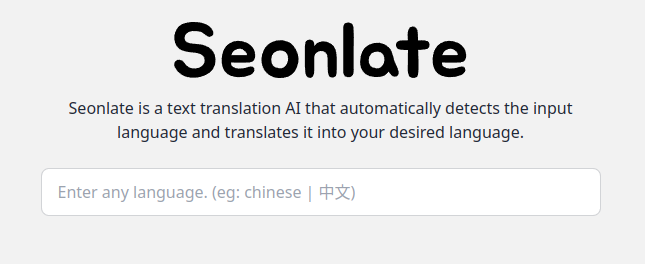
Nice! Now the user has to type in a language before they can start giving the text they wish to translate. This one simple thing will guide the user through the steps without having to explain anything to them.
Sending a request to the server
Now that we have built a form and added some nice-to-have functionality to it, it is time to start building the payload that will be received by the back-end server. Before we do this, let's collect what we need to perform a translation:
contentText- This is the content provided by the user and what we are going to be translating.targetLanguage- This is the language we will be translating into.
That's all we need - we don't need to know the language we are translating from because the AI will do its best to know that.
So with that in mind, let's establish that our payload is going to be formatted as such:
{
	"content": <contentText>,
	"to": <targetLanguage>
}
Remember the translate method I mentioned earlier? We'll be implementing this logic in there, using the native fetch API that all major browsers currently support.
/**
     * Performs translation by requesting a translation from the server.
     */
    const translate = async(): Promise<void> => {

        /* Set network processing state and error state. */
        isNetworkProcessing.value = true;
        hasErrorOccurred.value = false;

        await fetch("http://localhost:8081", {
            method: "POST",
            headers: {
                "Content-Type": "application/json"
            },
            body: JSON.stringify({
                content: contentText.value,
                to: targetLanguage.value
            })
        }).then(async(response) => {

            /* Retrieve json from the response */
            const json = await response.json();

            /* Set content */
            responseContent.value = json.content;

        }).catch(() => {

            /* Set error state */
            hasErrorOccurred.value = true;

        }).finally(() => {

            /* Update network processing state again */
            isNetworkProcessing.value = false;

        });

    }
Let's break down what happens in here.
isNetworkProcessingis set totrueto indicate that a request is currently pending for the purpose of updating the user interface to reflect this.hasErrorOccurredis set tofalsein case it was set totrueas a result of a previous request, we're trying again, so nothing has gone wrong just yet.- A
fetchcall is made tohttp://localhost:8001where I intend to host my Bottle server that will handle the translation request for us with the body in the format mentioned earlier. - Once we receive a response, we retrieve the JSON content of it and set
responseContentto be the response'scontentvalue. - If an error occurrs, we update
hasErrorOccurredto be true for the purpose of telling the user something went wrong. - In any case, regardless of state, we update
isNetworkProcessingto befalseagain as the request has finished.
We are now sending a request to a server that does not exist yet. So, let's go ahead and build the server now!
Building the server
We have completed our client for the purpose of translating text, we just have to go ahead and process this now using a server. Like I have mentioned before, I will be using Bottle because of its simplicity. So let's create a basic Bottle server.
from bottle import run

if __name__ == "__main__":
	run(host="localhost", port=8081, debug=True)
We now have a basic Bottle server that returns 404 for all routes - because we haven't created any yet! That's how simple Bottle is.
Allowing origins (CORS)
If you have ever developed an API like this before, you will know that all requests imposed from the client we have developed earlier will fail due to CORS. That's okay, easy fix. We'll be using the bottle_cors_plugin Python package to deal with this for us.
Our code now becomes this:
from bottle import app, run
from bottle_cors_plugin import cors_plugin


# Configure Bottle server.
app = app()
app.install(cors_plugin("*"))  # CORS - allow all origins.

if __name__ == "__main__":
	run(host="localhost", port=8081, debug=True)
We are now allowing all origins. This is incredibly insecure - if you wish to deploy this to production, you must have an environment variable using something like dotenv to control this value, but for the purposes of making a fun project that will not be deployed and will only run on our local machine - this is fine.
To give an example of a secure implementation:
app.install(cors_plugin("translator.icseon.com")) # CORS - allow requests to only come from translator.icseon.comProcessing JSON
As established earlier, our payload is in the JSON format. However, our server does not understand this yet and will not be able to read request.json just yet. Adding support for this is relatively simple, using a hook.
Let's create this hook. Our code now looks like this:
from bottle import app, run, hook, response
from bottle_cors_plugin import cors_plugin


@hook("before_request")
def set_default_content_type() -> None:

	"""
	Sets the default content type, so we can read JSON bodies from clients.
    :return None:
    """
    response.content_type = "application/json"


# Configure Bottle server.
app = app()
app.install(cors_plugin("*"))  # CORS - allow all origins.

if __name__ == "__main__":
	run(host="localhost", port=8081, debug=True)
Congratulations, we can now work with JSON using our Bottle server.
Creating a route for translation and implementing the AI
Now that we have a basic server setup and working, we will proceed to create a new controller to handle the translation logic. Let's start by creating a new file called translate_controller.py and creating a method called translate, which will look something like this:
from bottle import request


def translate(body: request) -> str:
	return "This is a response from the translate controller"
Let's go back to the main file and create a route for this controller and import the controller.
from bottle import app, run, hook, response, route
from bottle_cors_plugin import cors_plugin
from translate_controller import translate


@hook("before_request")
def set_default_content_type() -> None:

	"""
	Sets the default content type, so we can read JSON bodies from clients.
    :return None:
    """
    response.content_type = "application/json"


@route("/", method="POST")
def translate_route() -> str:


	"""
    Performs the translation by executing the translation controller.
    :return str:
    """
    return translate(body=request)


# Configure Bottle server.
app = app()
app.install(cors_plugin("*"))  # CORS - allow all origins.

if __name__ == "__main__":
	run(host="localhost", port=8081, debug=True)
We have now successfully defined a route for translation requests on path / and we will only accept POST requests through - other methods will be given a 405 response.
Let's go back to the translate_controller.py file and start implementing the AI. As mentioned earlier, I will be using the Llama Python bindings for this.
from bottle import request
from llama_cpp import Llama


# Intialize the LLM.
llm = Llama(
	model_path="./models/<your model>.gguf",
    n_ctx=4096,
    chat_format="<your chat format>"
)


def translate(body: request) -> str:

	"""
    Performs the translation by prompting LLM to translate for us.
    :param body:
    :return str:
    """

    print(llm)

    return "This is a response from the translate controller"
We have now initialized the large language model properly. However, you may notice I am unable to provide the model_path and chat_format to you - that's because you must have your own model and each model may have a different chat_format.
Now that that's out of the way, we must give a prompt to the AI. From some experience, I know that doing it manually will be ugly, so let's create a PromptBuilder class to deal with this for us. Start by creating a new file called prompt_builder.py (for example).
import json


class PromptBuilder:

	def __init__(self, to: str, content: str) -> None:

    	self.to = to
        self.content = content

        # Build request dictionary.
        self.request = self.__dict__

    def build(self) -> str:

    	"""
        Builds the prompt that we will be passing to the LLM.
        :return str:
        """
        # Give an example for the AI to work with.
        response_example = {
        	"to": None,
            "from": "<language you translated>",
            "content": "<translation>"
        }

        # Build, format and return the built prompt.
        return "You are a translation assistant that translates messages and responds with JSON like: {0}" \
               "You are translating the JSON string to {1} - ensure the response 'to' key is also that." \
               "Request: {2}".format(json.dumps(response_example), self.to, json.dumps(self.request))
What this will do is format promps that look like the following:
You are a translation assistant that translates messages and responds with JSON like: {"to": null, "from": "", "content": ""}You are translating the JSON string to nl - ensure the response 'to' key is also that.Request: {"to": "nl", "content": "Hello, I am bored."}
This informs the AI of its purpose and instructs it on what to do with the request given to it.
Now that we have a prompt, let's complete the implementation by importing the newly created PromptBuilder class into the translation controller.
from bottle import request
from llama_cpp import Llama
from prompt_builder import PromptBuilder
import json


# Intialize the LLM.
llm = Llama(
	model_path="./models/<your model>.gguf",
    n_ctx=4096,
    chat_format="<your chat format>"
)


def translate(body: request) -> str:

	"""
    Performs the translation by prompting LLM to translate for us.
    :param body:
    :return str:
    """
    # Initialize the prompt builder.
    prompt_builder = PromptBuilder(
		to=body.json.get("to"),
        content=body.json.get("content")
    )

    # Ask the LLm for an answer.
    answer = llm.create_chat_completion(
		messages=[
        	{
				"role": "user",
                "content": prompt_builder.build()
            }
        ]
    )

    # The AI may respond with "Result: <json>", so let's account for that.
    response = answer["choices"][0]["message"]["content"]
    result = "{" + response.split("{", 1)[1] if "{" in response else response
    return result
Awesome. We have now fully implemented the LLM and created an AI to expose it to the web.
The result
Now that we have built both the client and server, let's look at what we've built and see it in action...
Pretty cool!
Thanks for reading.
You have now read how I utilized AI to power a text translation service for me in as much detail as possible.
I hope you have learnt something or otherwise found entertainment in reading about this.
— Icseon